

ECDSA_SignVerify(SHA256) STM32F4 series
前言
針對驗證簽名部分,因近期客戶需求但MCU部分被綁定無法放入SBSFU去做更新,而且SBSFU更新部分目前提供範例也僅UART,其他interface需要自己coding,最後這邊討論後只做簽名驗證來防程式被修改,該章節會介紹簽名驗證流程和原SBSFU流程
參考軟體包
這邊因單純驗證簽名因此直接參考x-cube-cryptolib即可,因這邊使用F4系列所以這邊參考比較舊相近系列L152,因G4或L4是相對較新的系列避免有些Function不存在

圖解流程基本上如下

其實可以看到MCU會需要處理部分主要是把資料轉換,因這邊選用是SHA256所以是把檔案轉換SHA256格式,再透過ECC校驗,這邊公/私鑰匙的生成是透過OpenSLL生成,使用為外部軟體非在MCU內執行生成
SBSFU簡介
因SBSFU是包含加密更新部分,而F4是屬於比較舊款因此支援部分沒有到這麼多參考圖如下

而已更新步驟來說會如圖,因此你可以看到如果需要加密更新你的code size不能太大另外,或你的Flash size需要夠大(APP Code需要2倍大小,這邊大概說明流程,因這次只使用到驗證簽名部分所以這邊就不詳細說明

ECC驗證簽名Code
在程式上會分成2部分 Boot code和APP code,App code部分比較簡單會透過外部軟體所增加標頭檔部分打包起來
- 第一部分是Boot code轉跳位置(這邊因標頭檔佔32KB所以位置需要向後再Shift+200)

這邊主要2個檔案需要修改
1.system_stm32f4xx.c
2.ld檔案
#if defined(USER_VECT_TAB_ADDRESS)
/*!< Uncomment the following line if you need to relocate your vector Table
     in Sram else user remap will be done in Flash. */
/* #define VECT_TAB_SRAM */
#if defined(VECT_TAB_SRAM)
#define VECT_TAB_BASE_ADDRESS   SRAM_BASE       /*!< Vector Table base address field.
                                                     This value must be a multiple of 0x200. */
#define VECT_TAB_OFFSET         0x00000000U     /*!< Vector Table base offset field.
                                                     This value must be a multiple of 0x200. */
#else
#define VECT_TAB_BASE_ADDRESS   FLASH_BASE      /*!< Vector Table base address field.
                                                     This value must be a multiple of 0x200. */
#define VECT_TAB_OFFSET         0x00008200U     /*!< Vector Table base offset field.
                                                     This value must be a multiple of 0x200. */
ENTRY(Reset_Handler)
/* Highest address of the user mode stack */
_estack = ORIGIN(RAM) + LENGTH(RAM); /* end of "RAM" Ram type memory */
_Min_Heap_Size = 0x200; /* required amount of heap */
_Min_Stack_Size = 0x400; /* required amount of stack */
/* Memories definition */
MEMORY
{
RAM (xrw) : ORIGIN = 0x20000000, LENGTH = 128K
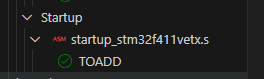
/*
TOADD
Modify ORIGIN of FLASH to meet the requirement of your application
*/
FLASH (rx) : ORIGIN = 0x8008200, LENGTH = 512K-32K
}

這邊是用python寫外部加密打包檔案這邊跟MCU較不相關未來再詳細說明
- 第二部分會比較多是Boot code也就是驗證簽名部分
這邊在來就是把加密軟體包的lib和API層放入你的專案內

把APP剛剛規劃標頭檔相關位置填入,因驗證部分會需要知道相關資料位置
- Copy Middlewares from STM32CubeExpansion_Crypto_V4.1.0 and paste it under the root of BOOT
- In CubeIDE::Tool Settings::MCU GCC Compiler::Include paths (-I), add the follwoing:
../Middlewares/ST/STM32_Cryptographic/include - Copy cmox_low_level.c from
STM32CubeExpansion_Crypto_V4.1.0\Projects\NUCLEO-L152RE\Applications\ECC\ECDSA_SignVerify\Src\cmox_low_level.c
and paste it under BOOT\Core\Src - In cmox_low_level.c, modify included header from stm32l1xx_hal.h to stm32xxxx_hal.h of target STM32 family
- In CubeIDE::Tool Settings::MCU GCC Linker::Libraries:

- Libraries (-l):
:libSTM32Cryptographic_CM4.a - Library search path (-L):
../Middlewares/ST/STM32_Cryptographic/lib
在執行檔中需要把Key引用帶入,在執行檔最後加入下方
/*
  Add the following lines to include the binary of public key
*/
.section PUBLIC_KEY, "a"
.incbin "../keys/public_key.bin"
鑰匙部分也是需要call外部軟體生成(OpenSLL)

# 1. put this shell script under BOOT/keys
# 2. Run CD to come here and run this script for the first time to generate key pair
openssl ecparam -name secp256r1 -genkey -out private_key.pem
openssl ec -in private_key.pem -pubout -outform DER -out public_key.bin
最後在main.c部分就比較簡單主要是把加密驗證簽名部分補上即可,前半在做把鑰匙BIN和簽名BIN輸入陣列中
mox_hash_retval_t hretval;
    cmox_ecc_retval_t retval;
    size_t computed_size;
    /* Fault check verification variable */
    uint32_t fault_check = CMOX_ECC_AUTH_FAIL;

    uint32_t app_img_size = *APP_IMG_SIZE_PTR;

    memcpy(myPublicKey, PUBLIC_KEY_PTR ,sizeof(myPublicKey));

    memcpy(mySignature, SIGNATURE_PTR , sizeof(mySignature));
